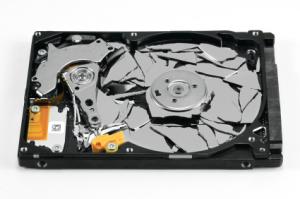
First day of the year in the office, and a call came up "site isn't working". Browsing to the site, I noticed it couln't connect to the database. Thinking it was probably some glitch, I logged in remotely to the server, to find that the filesystem was readonly. After trying to figure out why me, being root, could not do anything to the filesystem... it rebooted. My first filesystem crash.
After salvaging what I could with various utilities, I came to two realizations:
- a. The website directory was completely destroyed (managed to find some partial files) with no directory structure and most often not even proper filenames in lost+found)
- b. The MySQL directory was also in lost+found... with missing the ibdata1 file.
Oh well, time to restore the backups then... only to realize the filesystem crash took those with it (they were on the same datastore).
And even though I managed to salvage all the custom code, the database was a different story. It appears that even if you explicitly tell MySQL (using InnoDB) to use separate files for its tables ( innodb_file_per_table=1 ), a missing ibdata1 file equals corruption.
After trying a number of different methods, some working more than others, this is what finally did it for me.
First thing was to create a new VM with a working MySQL.
  root@rescuebox# yum install mysql-server
  root@rescuebox# /etc/init.d/mysqld start
and use at least the following statements in your /etc/my.cnf file:
[mysqld]
  innodb_file_per_table=1
  innodb_force_recovery=5
This will make MySQL skip a lot of checks on your data. You then need to create a dummy database, with dummy tables that have the same names as the ones you wish to restore.
The easiest way, when restoring lots of tables, is to use the shell to get a list of files:
  root@rescuebox# ls -1 *.frm > ~/tables.sql
  root@rescuebox# sed -i 's/^/create table /' ~/tables.sql
  root@rescuebox# sed -i 's/.frm/ (id int) engine=innodb;/' ~/tables.sql
what the above does, is
- create a list of your .frm files (to avoid duplicate names),
- transforms each line to an SQL create table statement by
- prepending "create table" and
- replacing the .frm with a dummy int column definition, and InnoDB engine.
Now to import the above into your dummy database -- I'll create one called recover here:
  root@rescuebox# mysql -e "create database recover"
  root@rescuebox# mysql recover < ~/tables.sql
Depending on your hardware and number of tables, this can take a bit. Once it's done, you need to stop MySQL:
root@rescuebox# /etc/init.d/mysqld stop
before doing a bait and switch with the definitions.
We copy over our .frm files now. I assume that:
- MySQL is at the default location ( /var/lib/mysql so that a subdirectory for the database exists)
- your backup is at ~/sqlbak, and
- the temporary database name is recover
  root@rescuebox# cd /var/lib/mysql/recover
  root@rescuebox# rm -f *.frm
  root@rescuebox# cp ~/sqlbak/*.frm .
  root@rescuebox# chmod 660 *
  root@rescuebox# chown mysql:mysql *
root@rescuebox# /etc/init.d/mysqld start
As you can see we replace the generated .frm files with our own, and fix permissions / ownerships to the way it was. Then login to the interactive shell to flush the tables:
  root@rescuebox# mysql
  mysql> use recover;
  mysql> flush tables;
  mysql> exit;
  root@rescuebox# mysqldump recover > ~/recover-structure.sql
If all went well, you should have your structure into that SQL file! That is just the first step, obviously. Make sure to keep a copy though, since there are WAY more guides online on how to restore your database by having your .ibd, .frm AND structure files.
For the next step, we first need to do something drastic: remove the stock MySQL and add the very latest 5.6 build. The reason behind this is that it has a couple of funcionalities missing from previous releases, and in my experience, the tools from Percona were stumped with my database.
  root@rescuebox# yum install mysql-devel ncurses glib-static
  root@rescuebox# yum groupinstall "Development Tools"
before the guide, since those are assumed to be installed.
Thankfully, Oracle now has a yum repo for their releases, making much of the pain go away:
  root@rescuebox# yum remove mysql-server
  root@rescuebox# yum install wget
  root@rescuebox# rm -rf /var/lib/mysql
  root@rescuebox# mv /etc/my.cnf /etc/my.cnf.bak
  root@rescuebox# wget http://dev.mysql.com/get/mysql-community-release-el6-5.noarch.rpm
  root@rescuebox# rpm -ivh mysql-community-release-el6-5.noarch.rpm
  root@rescuebox# yum install mysql-community-server
  root@rescuebox# /etc/init.d/mysql start
In the above, I've moved our my.cnf out of the way, or MySQL won't create its own structure, and fail to start. We need to edit our my.cnf file for the next step, lowering the debug level to 1:
[mysqld]
  innodb_file_per_table=1
  innodb_force_recovery=1
and then moving it back in place, and restarting MySQL:
  root@rescuebox# mv /etc/my.cnf.bak /etc/my.cnf
  root@rescuebox# /etc/init.d/mysql restart
we now need to recreate our database cleanly (MySQL still compains in the background about the previous bait and switch):
  root@rescuebox# mysql -e "create database recover";
  root@rescuebox# mysql recover < ~/recover-structure.sql
  root@rescuebox# /etc/init.d/mysql stop
As you can probably imagine by now, we will be doing more bait and switch, and applying some queries on top.
  root@rescuebox# cd /var/lib/mysql/recover
  root@rescuebox# rm -f *.ibd
  root@rescuebox# cp ~/sqlbak/*.ibd .
  root@rescuebox# chown mysql:mysql *
  root@rescuebox# chmod 660 *
Before starting up MySQL, lets create the files with the queries to run. What happens now is that the internal ID of your table is different than the one specified in the copied over .ibd file. In earlier version of MySQL, you actually had to sync them. In 5.6, you can just force it to use the one defined in the .ibd (assuming it's not used, which is why we need to run this on a clean database server):
  root@rescuebox# cp ~/tables.sql ~/tablespace1.sql
  root@rescuebox# sed -i 's/create/alter/' ~/tablespace1.sql
  root@rescuebox# sed -i 's/ (id int) engine=innodb;/ discard tablespace;/' ~/tablespace1.sql
  root@rescuebox# cp ~/tables.sql ~/tablespace2.sql
  root@rescuebox# sed -i 's/create/alter/' ~/tablespace2.sql
  root@rescuebox# sed -i 's/ (id int) engine=innodb;/ import tablespace;/' ~/tablespace2.sql
  root@rescuebox# /etc/init.d/mysql start
  root@rescuebox# mysql recover < ~/tablespace1.sql
  root@rescuebox# mysql recover < ~/tablespace2.sql
  root@rescuebox# mysqldump recover > ~/recover-structure-data.sql
Don't worry much about most warnings that occur -- the dump you get should have both your structure AND data! You may not use that .sql file to import into your normal machine.
If you find any bugs or steps missing, or even steps that need more explaining - please let me know in the comment section, as I'm writing most of this after the fact by memory; or just let me know if it helped! I'll be getting myself some beer now...